


If you’ve been thinking about upgrading your vehicle’s headlights but worry the process might be too technical, you’re not alone. The good news? The LED Headlight Assembly is designed with everyday drivers in mind — no custom wiring, no cutting, no guesswork.
In this in-depth review, we’ll walk through what makes this LED assembly a smart upgrade, how the installation process really works (yes, you can do it yourself), and what to expect in terms of performance.
Why Choose LED Over Halogen or HID?
Let’s start with the basics — why LED?
Compared to halogen or HID headlights, LEDs bring a few serious advantages:
- Brighter, clearer light output that dramatically improves nighttime visibility.
- Longer lifespan, typically over 50,000 hours — that’s years of maintenance-free driving.
- Energy efficiency, meaning less drain on your battery and alternator.
- Cooler operating temperatures, which help preserve headlight housing and wiring.
Once you’ve driven with LEDs, especially on dark country roads or in poor weather, it’s hard to go back.
What’s Inside the Hawkglow LED Headlight Kit?
Right out of the box, the Hawkglow LED Headlights come pre-assembled in a durable, weather-sealed housing that feels built to last.
Here’s what you get:
- Pre-assembled LED headlight unit(s)
- Plug-and-play connectors
- User manual with install guide
- Optional rubber seals (depending on model)
What sets Hawkglow apart is how closely the design mirrors OEM specifications — meaning the lights fit your vehicle’s existing headlight housing without needing modifications.
Step-By-Step Installation Guide
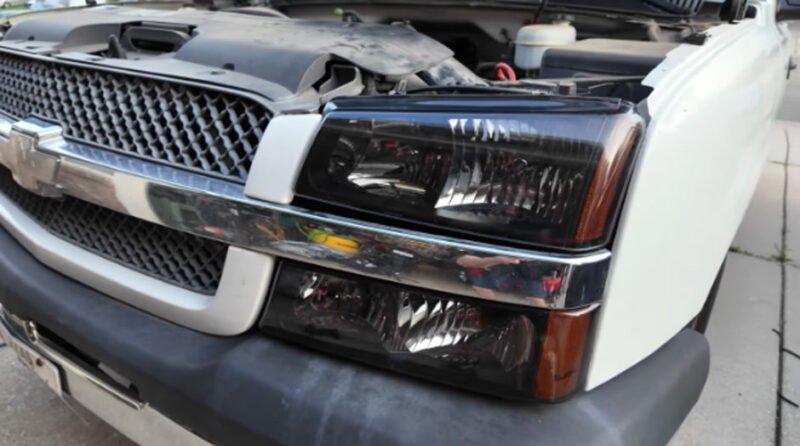
1. How to remove the Stock Headlight Assembly
The replacement of your old headlight assembly must be done carefully. Here’s how:
- Reaching the mounting bolts or clips
- Identify and remove the bolts or clips that holds your factory head light housing. They are usually located at the back of the housing or the engine compartment.
- The removal of the wiring harness
- Disconnect the wiring harness that runs to your existing headlight and do this in a careful manner. Apply a light force which does not harm the wires.
- Disorderly removal of the old housing
- Pull the factory factory headlight housing out carefully. Take care so as not to scratch or damage adjacent parts.
2. The installation of Hawkglow LED Headlight Assembly
- Well now comes the amusing part. This is how you can install your new Hawkglow LED headlights.
- Tightening and joining the new assembly
- Insert Hawkglow assembly in the headlight slot and make sure it fits in a perfect manner. Fix it, with the mounting bolts or clips.
- The wiring harness of the Hawkglow
- Firmly insert the wiring harness on the vehicle on the Hawkglow assembly. Make certain that it clicks, so the connection of power is not fluctuating.
- The importance of a water tight fit and seal
- Look over the assembly to see whether there are gaps or unlevel positions. Use a dab of glue to seal the unit water tight, stopping moisture collect in the housing.
3. Function Checking The Headlight Assembly
To make sure that the new headlights are working and visually flawless, it is necessary to ensure that prior to driving them; they are both faultless and effective.
- Connect the battery again.
- High/low Beams Test/headlights on
- Align check beams, or readjust
- Last Hacks and Troubleshooting
- Handling flickering or dashboard error
In order to make your headlights maintain the best performances, clean it regularly using a soft cloth and lens cleaner. It could also be sealed in a UV-resistant headlight sealant, to avoid clouding in the long run.
Summary of installation steps
Whether it is taking out your stock assembly to the testing of your new Hawkglow LED headlights, this guide has laid out clear and actionable instructions that can be followed all the way by you and come out at the end of it advice competent to do the job.
Maintenance & Long-Term Tips
Once installed, your new headlights won’t require much upkeep. Still, here are a few best practices:
- Wipe lenses with a soft microfiber cloth to keep them clear.
- Apply a UV-resistant sealant every few months to prevent yellowing.
- Avoid using abrasive cleaners or pressure washers directly on the housing.
Advantages that you ought to see instantly
After the installation, you will see much better visibility, energy consumption and general safety on the road.
Consulting a professional For when to consult a professional see the chapter on Hiring Contractor Services.
Should troublesome problems occur, or you are uncertain in any details of the process, it is advisable to get professional to do this to guarantee successful installation and comfort.
Be confident and upgrade your ride! Vehicle owners will never drive at night in the same way as before using Hawkglow LED headlights.
Final Verdict: Should You Buy the Hawkglow LED Headlight Assembly?
If you’re after better nighttime visibility, safer driving conditions, and a clean OEM-style fit, the Hawkglow LED headlight assembly delivers — especially for the price point.
It’s one of the most accessible, beginner-friendly LED upgrades we’ve tested, with real results that show immediately on the road.
Ready to Make the Switch?
If your current headlights just aren’t cutting it — whether they’re too dim, yellowed, or just outdated — the Hawkglow LED Headlight Assembly is a smart, high-value upgrade that won’t break the bank.
Check compatibility for your vehicle, order your set, and see the road in a whole new light.